The New Convivialist

Month: June, 2012

Baking American Abroad

This is a huge topic and one I will most likely return to in the future. That is, baking like an American but living away from the United States.

The first problem is easy to overcome. Most recipes originating in the United States, whether in cookbooks, magazines, blogs or newspapers, come with distinct measurement systems: cups, ounces and sticks of butter, to name a few. Elsewhere in the world, the metric system rules and usually recipes are measured in weight, not volume. The good news is that most professional cookbooks and now many blogs publish recipes with both American/British home-cooking measurements and more universal standard measurements. Kitchen scales are precise and not so expensive, after all. When baking for myself in Europe, I tend to use a combination of these systems. Not ideal, but it works. When sharing recipes publicly, I try my best to offer both measurement systems. So that’s that.

The next problem is not so easy to overcome. American recipes rely on such beautiful ingredients as brown sugar, molasses, baking soda and vanilla extract, to name a few. Many of these are difficult, if not impossible to find in continental Europe, more specifically Berlin. Luckily I have managed to find a source for pure vanilla extract and do not have to rely on the entirely unsatisfying German substitute of “vanilla sugar”. Brown sugar is more difficult, as are the leavening agents like baking powder and baking soda. For the latter two, I am certain a decent replacement could be managed, but I haven’t yet mustered the patience to experiment with those tiny packets labeled “backpulver”.

So where does this leave me? With suitcases and carry-on bags filled with baking supplies every time I make the cross-Atlantic trip. Sustainable? No. Dangerous? Perhaps. Imagine trying to explain to a Homeland Security agent that those boxes of white powder in your shoulder bag are “just for baking”. Indeed. Since I have yet to find an alternative, that is how it will have to be. Needless to say, I don’t do much experimentation with ingredients like (dark) brown sugar. I need a good, solid, tried and true recipe before I devote an entire cup of the stuff to a baking endeavor. With the salty oatmeal raisin cookies below, I can be guaranteed that the investment will pay off.

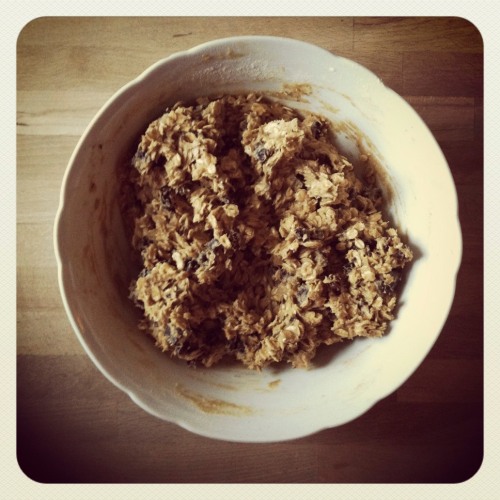
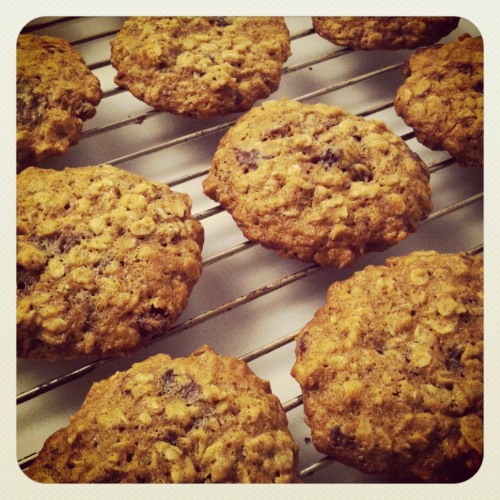
The texture of these oatmeal cookies is rich and chewy, which is the way I like them most. I believe this is due to use of only dark brown sugar and not any regular granulated sugar. The sprinkling of sea salt at the end beautifully counteracts the sweetness of the raisins.

Recipe

Chewy Oatmeal Raisin Cookies with Sea Salt

1 cup (2 sticks, 8 ounces, or 225 grams) butter, softened

1 1/3 cup (250 grams) dark brown sugar, packed

2 large eggs, beaten

1 teaspoon vanilla extract

1 ½ cup (190 grams) all-purpose flour

1 teaspoon baking soda

1 teaspoon ground cinnamon

¼ teaspoon ground nutmeg

1/2 teaspoon table salt

3 cups (240 grams) rolled oats

1 1/2 cup (240 grams) raisins

sea salt (Fleur de Sel)

1. Preheat oven to 350°F (175°C).

2. In a large bowl, cream together the softened butter, dark brown sugar, beaten eggs and vanilla until smooth.

3. In a separate bowl, whisk the flour, baking soda, cinnamon, nutmeg and table salt together. Stir this into the butter/sugar mixture. Stir in the oats and raisins.

4. Chill the dough for at least ½ hour. It can also be more. Or you could even roll it into balls and freeze.

5. Scoop out 1-2 Tablespoon sized balls of dough (depending on how large you would like the cookies) onto a parchment-lined baking sheet, about two inches apart.

6. Bake cookies for 10 to 12 minutes. Remove from oven when they are golden on the edges but still a little undercooked on top. Immediately sprinkle a few flakes of coarse sea salt over each cookie. Leave them to sit on the hot baking sheet for a couple of minutes before transferring them to a rack to cool.

Three cheers for the Euro Cup and Okonomi-yaki

Euro Cup fever has hit. Berliners and, I am quite sure, nearly all Europeans will superglue themselves to televisions in bars, living rooms and on the streets for the next few weeks. Naturally, as a football-ignorant American, I am quite immune to all of this sports-viewing fervor. But I could not turn down the offer to watch the Italy/Spain game this weekend when it involved the enticing footnote of dinner prepared with a few Japanese friends, one of whom had just arrived from Tokyo with a bag full of authentic ingredients to prepare Okonomi-yaki.

Okonomi-yaki. The dish was new to me and when I asked what it tasted like, it was described as a Japanese pancake with vegetables and toppings. Ok, I thought, like a scallion pancake, that ubiquitous “pan-asian” choice on the menu at many not-so-authentic Japanese, Vietnamese and Chinese restaurants. That was my (admittedly low) expectation. But less than an hour into the preparation process I realized how seriously I had underestimated what I was about to eat. Later when Satoshi, one of the Japanese friends present who is also completely fluent in English, told me that the literal translation of Okonomi-yaki is “whatever you like, put in”, the true nature of the dish began to reveal itself.

The thing that surprised me most about the process of making Okonomi-yaki was how much FUN it was. In Europe and the US, one has the image of Japanese food as…restrained. Beautiful and delicious, but unfailingly, perfectly executed. Particularly when eating in a nicer Japanese restaurant. Therefore I was surprised to have such an ecstatic feeling of freedom in the kitchen with Hina, Miki, Indy and Satoshi, these four high-spirited Japanese home-cooks.

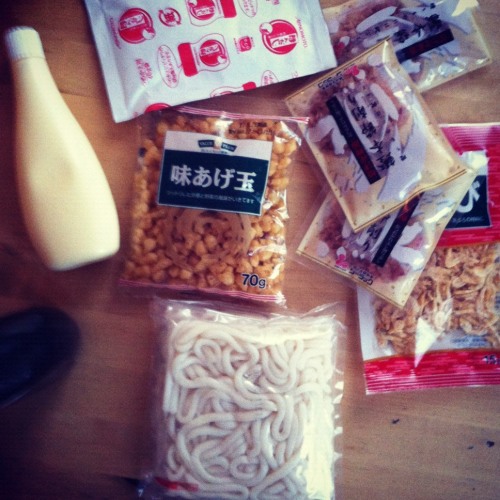
If I give you a recipe, I think this dish would be impossible to replicate. Many of the tiny bags of flakes, flavors and fried bits that Hina brought with her in unmarked plastic satchels from Japan I would have no idea where to find in Berlin. On the other hand the great part is, with a few key ingredients, you can’t really go wrong. Because in the end, really, ‘whatever you like, put in”.

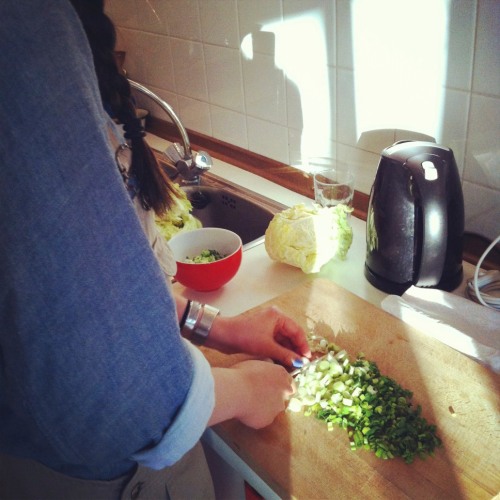
The start is pretty basic: make the batter, which in Japan is always with a base of a kind of potato flour that apparently does not exist elsewhere. Normal wheat flour, however, is a fine substitute. To this add one egg and slowly whisk in water as needed to make a batter with a consistency like a crepe batter– smooth and fairly liquid. The secret ingredient to add to the mixture is dashi, a sort of seasoning like salt or soy sauce that is actually extremely tiny balls made from dried fish or kelp. Chop a large head of white cabbage into small pieces and add it to the batter, which will thicken it considerably. This will be your pancake base. Now is where it gets more experimental and just plain fun.

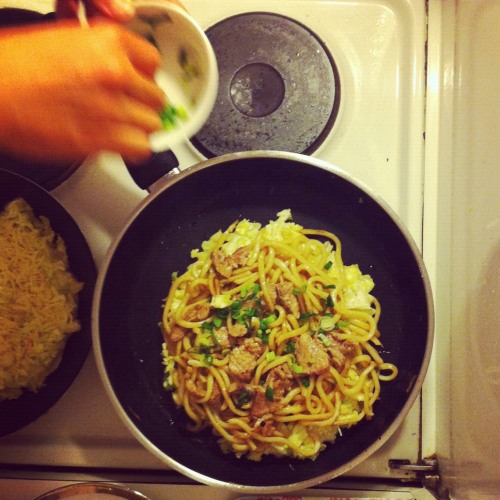
Some classic versions of Okonomi-yaki include pork, cheese, mochi (little cubes of pounded, compressed rice) and fried udon noodles. We tried all of them, and in various combinations. The udon version I found particularly unruly to cook, but also the most delicious in the end. One must fry the udon noodles beforehand in a non-stick pan coated with a bit of vegetable oil. When they are cooking, add a pinch of sugar and some soy sauce until slightly browned.

Say you want to make udon pork Okonomi-yaki. Pour a bit of oil in a non-stick pan over medium-high heat, and once hot enough, scoop two large ladles of batter into the center. It will be about 8 in (20 cm) in diameter and 1 in (2.5 cm) thick. Place on top a few pieces of pork (already fried or, ideally, grilled), a scattering of scallions and some dried shrimp (can be purchased at any Asian supermarket), followed by the batch of fried udon. It will take some tricky maneuvering with the spatula to get everything to stay in a nicely shaped pancake form, but beauty is not exactly the point of this exercise. Flipping is the real challenge. In our case, when the tiny and adorable Miki managed to singlehandedly flip the pork-udon monster, more cheers rang out amongst the group than when Italy scored its only goal a few hours before.

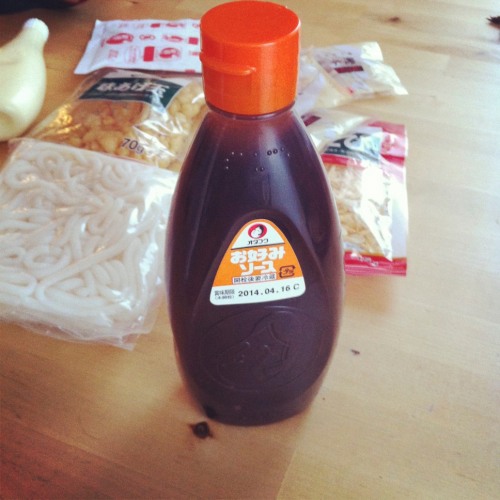
Once nicely browned, slide the finished pancake onto a large plate and season/decorate it. Essential for taste and aesthetics are two sauces, one a Japanese mayonnaise (I don’t even want to know what’s in it) and the other a Japanese Okonomi-yaki brown sauce, which is slightly sweet and soy sauce-like, only thicker. Both you can purchase at an Asian supermarket, but they will be quite expensive compared to what they cost in Japan. The most beautiful way of putting the sauces on the pancake is squeezing them out in a lattice form (think Jackson Pollock’s drip paintings, only more orderly). Once you have this as a base, sprinkle on some chopped scallions, little sticks of pickled ginger, dried fish flakes and agedama, which are basically the crispy bits of tempura leftovers. Nobody ever said Okonomi-yaki was good for you. Healthful or not, during the process I felt like a kid again, observing all seven of our group clustered around this pancake, throwing on colorful condiments, laughing and cheering the entire time.

It may sound like a lot, and it was. In the final result, though, all these flavors blended harmoniously together in umami perfection. Traditionally in a restaurant in Japan, one would get an entire pancake for himself or herself, similar to ordering a pizza in an Italian restaurant. Instead, we sat on pillows around a low table in Babeth and Emanuele’s living room and cut the Okonomi-yaki into pieces to share, along with green salad and German beer. If this tradition were to continue for the duration of the Euro Cup, I might just be convinced to watch a few more games…

*A note on UMAMI. On a theoretical level I get what umami is. That elusive taste – both distinct from but also a combination of – sweet, sour, bitter and salty. The one that every Western cuisine tries to achieve, but that the Japanese can manage so effortlessly. It was only during the preparation of this particular meal that I really comprehended how it is quite simply created. It is no big secret. From my own novice understanding the easiest way to produce umami is just taking what comes from the sea and naturally processing it: compressing, drying, fermenting, etc. That is why just a sprinkle of those tiny dried fish or kelp granules (dashi) helped to make the Okonomi-yaki complete and wholly satisfying. Not to say that you need to run around the kitchen adding dashi to every meal you prepare. But I think I might try it on occasion– in my scrambled eggs, for instance, or maybe in a vegetable soup. Any other suggestions?


Achte Dritte Mitte

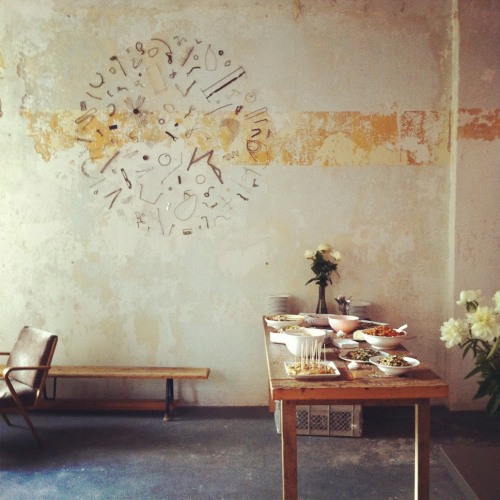
Since November, four friends and I have been hosting a regular aperitivo pop-up event during the third week of every month in the center of Berlin Mitte. Aptly named Dritte Mitte, we originally wanted to bring friends together for a classic Italian ‘aperitivo’, encouraging them to stop by after work for a Spritz and a little something to eat. The concept of an early-evening buffet for snacking while relaxing with a drink after work is quite foreign to Berliners (and also, as I distinctly recall, to Americans). Spain has its tapas, Italy its aperitivo, but Berlin… only Currywurst on the way to a party that probably doesn’t start until after midnight. In short, we wanted something different.

After our eighth aperitivo last night, I am happy to confirm that the concept has caught on quite nicely, and the small café that we use to host Dritte Mitte is completely packed with an international crowd of Italophiles (is that a word?) every month.

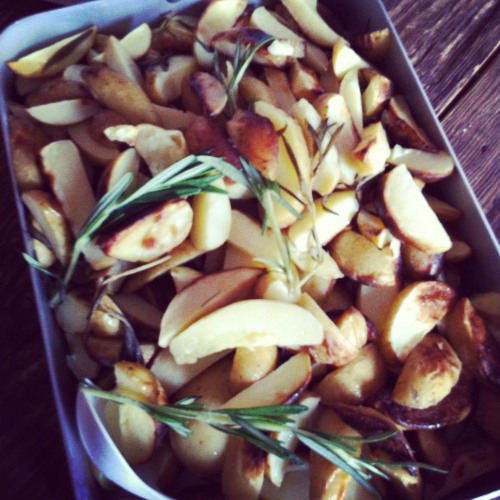
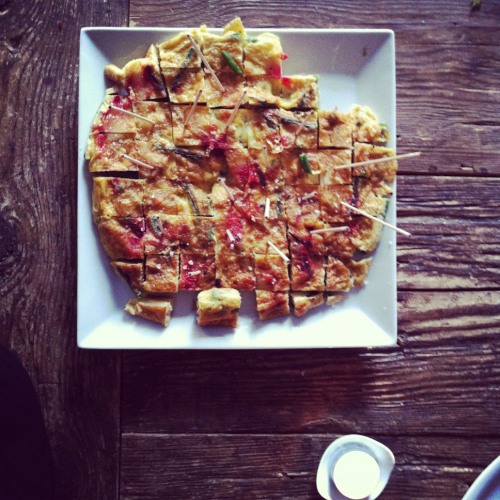
And the food. We each have our regular specialties. Frank is now the master of the polpette (meatballs in a white wine rosemary sauce). Til comes up with seasonally inspired tortillas every month, as well as his proprietary green olive and black olive pates. Katharina is the vegetable roasting queen– each one perfectly cooked and seasoned. Lorenzo is the one real Italian of the bunch of us. After a first aperitivo of slaving away with 2 kilos of his mama’s pizza dough recipe, he has now taken on a more realistic, but no less delicious lasagna. I, on the other hand, simply cannot bear to make the same dish for more than a few months in a row. My current specialty is eggplant ‘meat’balls with roasted cherry tomatoes (see post).

Drinks always include a carefully selected Italian white wine, Italian red wine, Aperol spritz or Campari spritz, and a special mixed drink. Last night was the ‘Hugo’, a splash of Holunder (elderflower) syrup and prosecco, topped with a slice of lime and a couple leaves of fresh mint. With the parks of Berlin simply reeking of Holunder flowers at the moment, it was the ideal drink for the season.


The Season of the Tart

Recently I have been thinking a lot about those nights that can only happen when the sun doesn’t set until very late. Usually it is a Sunday night. There was perfect sunshine and you’ve spent the entire day outdoors with a big group of friends or family, maybe sitting in the park or lying on the beach, maybe playing something or riding something. No matter whether active or inactive, the simple state of being outside in the sun all day brings you to a certain point of utter exhaustion by at least 9 pm. A shower momentarily refreshes the senses and the sunburn lotion the skin. You might even have the energy to eat something small. Eventually, though, domestic comfort and promise of sleep beckons. It’s not even dark yet, you protest.

But that is exactly what I am talking about. The course of that particular day has completely warranted crawling into bed while there’s still a blue glow of light in the sky. Don’t bother drawing the curtains, just embrace the horizon and sink into the best sleep you can have.

I am still waiting for a night like this. I tell myself I need to be patient- it’s only early June after all. Last weekend, for example, I went into bed as the sun was rising rather than setting (in my defense, it rises pretty early!). This was naturally for a very good reason- the birthday of my good friend Babeth. I won’t go into details about the aurally entertaining Japanese/English karaoke-themed evening (though you can easily imagine), other than to give you the recipe for the particular Birthday Cake–ehem, tart­– that she specifically requested I make.

In general, I prefer to make tarts and other lighter, fruit-based desserts during this time of year. This lime tart in particular, I began baking regularly last year in a different iteration, with my co-conspirator-in-baking friend Madeleine. The original recipe called for sweetened condensed milk but after a while, I began to wonder what it would be like with coconut milk instead. I historically love the flavor combination of coconut and lime, and it seemed even more spring-like than the far heavier sweetened condensed milk.

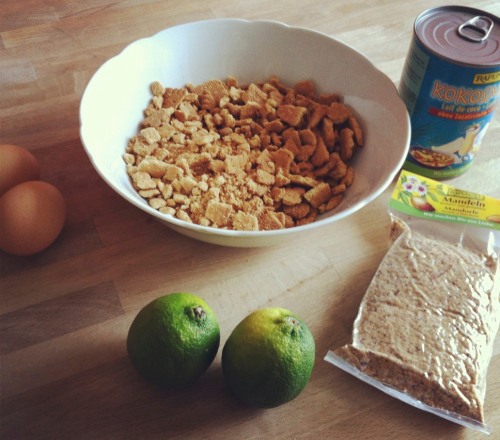
The tart shell is a combination of ground almonds, flour, sugar and crushed butter cookies, bound together with some melted butter and egg white. Just a note about the kind of butter cookie: I suppose if you come from a country that has graham crackers readily available (USA), this would be an excellent choice, but my very good alternative turned out to be butter Dinkel Keks (spelt cookies) from the bio market. You can always get very cheap butter cookies, but trust me- invest the extra Euro for a pack of these spelt things- the taste and texture of the shell are noticeably better as a result. About the nuts, I used pre-ground because I don’t have a food processor (tragic, yes, I’m collecting donations), but I think grinding your own almonds is a fantastic idea. You can even experiment with the type of nut. Pistachio would intrigue me.

The filling is very easy. Just whisk together a can of coconut milk, sugar, egg yolks, a bit of flour to thicken and a good splash of lime juice and you have it. The filling will be very liquid when you pour it into the shell, so be careful when placing it into the oven. Also, remember that coconut milk contains coconut oil, which liquefies at a fairly low temperature (about 25°C), so as the tart bakes, it will probably remain slightly liquid looking. Once you take it out and cool it, though, it should solidify. Refrigeration helps it do so even more.

The resulting dessert is quite fresh and intense, but doesn’t feel too heavy. I would say it’s the perfect finish for warm days that lead to late nights out or early nights in.

Recipe: Coconut lime tart

Shell:

200 (7 oz) gram pack of butter cookies (or graham crackers)

125 (4.5 oz) grams ground almonds

¼ cup flour (37.5 grams)

¼ cup granulated sugar (56 grams)

½ tsp. baking powder

½ tsp. salt

82.5 grams butter (6 Tbsp)

1 egg white

Filling

1 can (400 mL) coconut milk

1/3 cup granulated sugar (75 grams)

2 egg yolks

a few pinches of flour

juice from 2-3 limes (depending on size)

zest from 2-3 limes (depending on size)

1. Preheat oven to 325° F (175° C) and place rack in the center of oven. Prepare an 9-10 inch (23-25 cm) tart pan with removable bottom by coating lightly with butter.

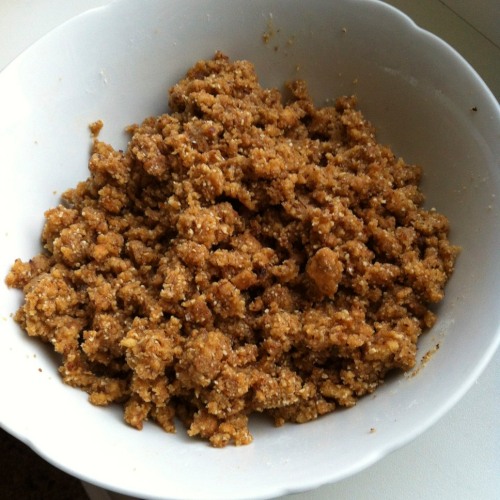
2. Prepare the tart shell. Melt butter in saucepan or microwave and set aside to cool slightly. Crush cookies, either by hand or in a food processor. Pour into a large bowl. Add ground almonds, flour, granulated sugar, baking powder and salt. Mix together. Pour melted butter over the dry ingredients and stir to evenly combine. Separate eggs. Add egg white to the mixture to evenly combine. Dough should be fairly stick and not dry.

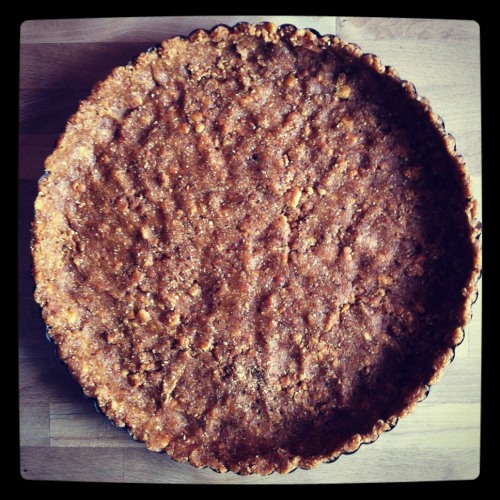
3. Scoop the mixture into the prepared tart pan and press evenly into the bottom and edges. Note that you can also use a standard spring-form pan- just press the dough about 1 inch up the sides. Place pan into the oven and bake until lightly browned, about 10-12 minutes. Remove from oven and cool for about 20 minutes.

4. Meanwhile, prepare the filling. Zest the limes and set aside zest for later. Juice the naked limes into a small bowl. Shake and then open can of coconut milk. Pour into a large bowl and whisk in the granulated sugar and egg yolks until smooth. Add lime juice and whisk until combined. Finally, add a few pinches of flour to thicken slightly. Whisk until combined and smooth. Immediately pour into the cooled tart shell and put carefully back into the oven (the filling will be quite liquid).

5. Bake for 20-30 minutes. This will depend on how thick the filling is and on your oven. You want it to start to set. Remove from oven, sprinkle reserved lime zest over the top and cool completely. Put into the refrigerator for at least one hour before serving.

Makes enough for about 10 pieces of tart.